Give Your Pictures and Posters a More Antique or Vintage Feel

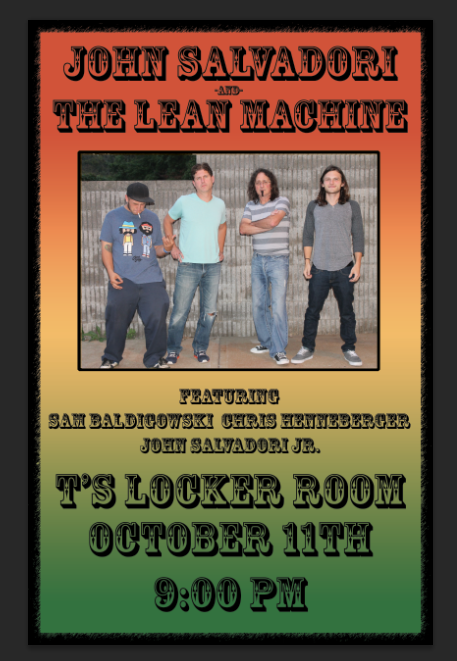
While working on this year’s gig poster for a show I play with my dad once a year, I got to a certain point as you see below.

Screen Shot 2014-10-01 at 9.39.39 AM

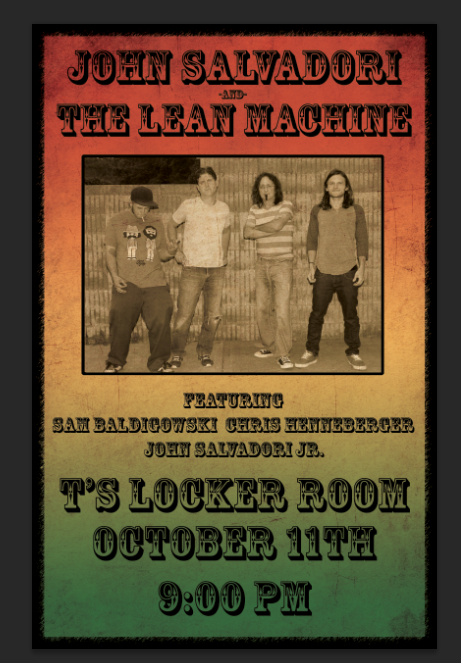
It was coming along nicely having kind of a old western wanted poster feel too it, however it still didn’t feel ‘real’ and ‘vintage’.  So i did a couple easy photoshop tricks that improved this poster a lot.

1. Okay first thing is that the band picture didn’t look right being full color, so i went to image-adjustments-desaturate.

Screen Shot 2014-10-01 at 9.34.12 AM

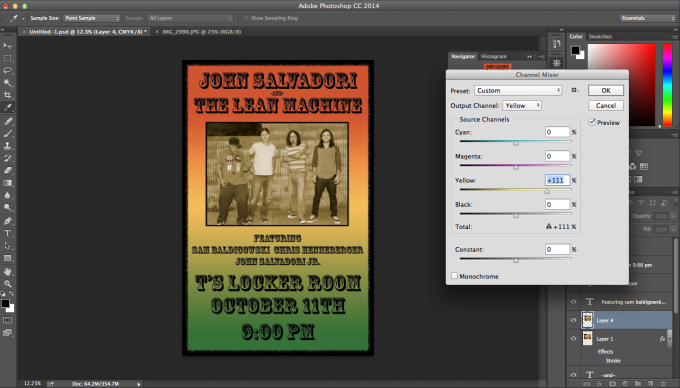
2. Even though it was black and white now, i still felt like it needed a more sepia feel so i added some yellows by going to image-adjustments-channel mixer.  Next when the channel mixer window pops up, you have to change the output color to yellow, and then adjust the yellow slider past 100%.  You can see my settings and results below. NOTE!!! I am working in CMYK color mode as opposed to the default RGB mode. So your channel mixer window will have different colors, however you just have to mix colors to get the yellow.  The reason I’m in CMYK is because Kinko’s printing, where we get these posters printed, uses CMYK.  So by working in CMYK I insure that my poster will be printed accurately and with the same colors.

Screen Shot 2014-10-01 at 9.33.13 AM

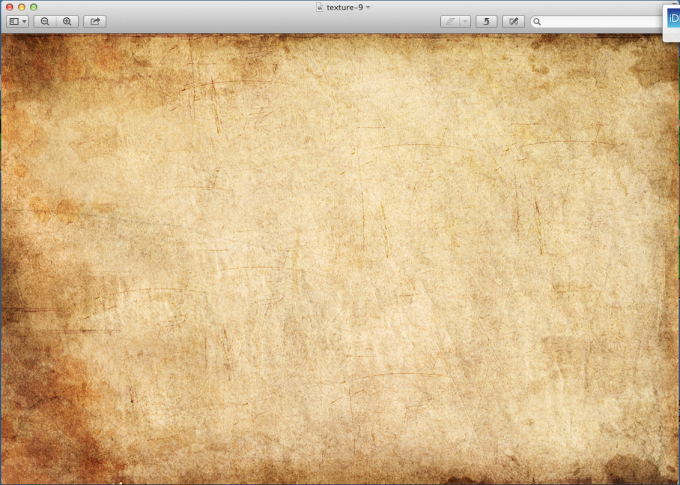
3. So as you see above its coming along nicely but still not there yet.  Its a little lifeless and hollow.  So next i search google images for a photoshop texture and found this one.

Screen Shot 2014-10-01 at 9.34.56 AM

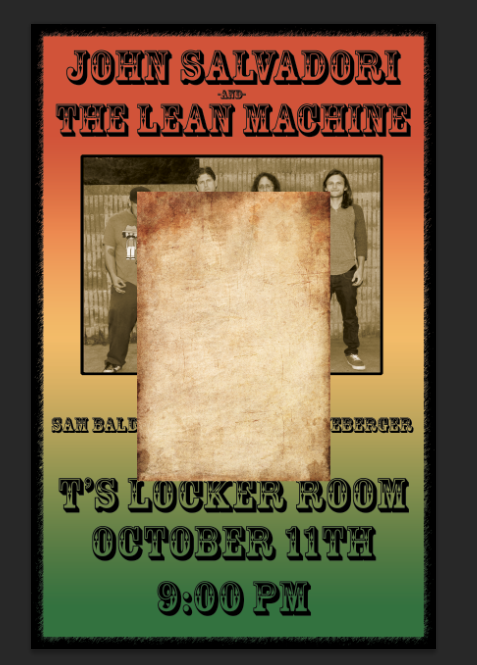
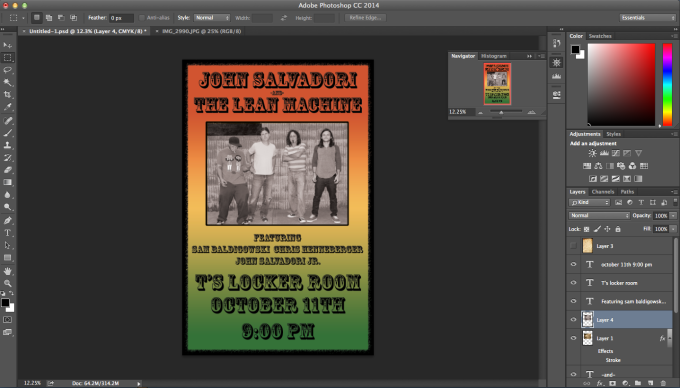
4. Open this texture in photoshop, copy it into your project and add it too the top most layer as so.

Screen Shot 2014-10-01 at 9.36.00 AM

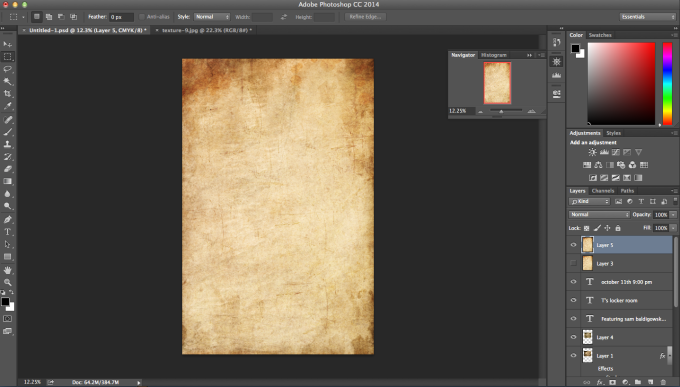
5. Next you want to free transform this texture so it covers the entire canvas.

Screen Shot 2014-10-01 at 9.36.32 AM

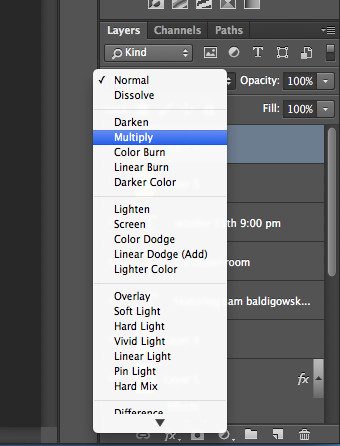
6. Now the magic part! Make sure that top texture layer is selected and click the box above in the layers section that says normal.  You’ll see a bunch of options however choose multiply as seen below.

Screen Shot 2014-10-01 at 9.36.43 AM

7. Thats it! Your picture has a more ‘real’ feel too it now as opposed to a flat lifeless image. Thanks for reading and have fun! 🙂
Screen Shot 2014-10-01 at 9.36.56 AM

How to: Trendy Vintage Video on Premiere Pro

This “How to” blog will show you one way that you can take certain parts of your video or your entire video and make them have an antique or vintage look. This technique could also be applicable to shading your video with different colors as well to acquire different effects. To begin open up your project and go to the area that you wish to make look vintage.

1. First, go to File at the top of your computer screen, and go to “New.” Select “Color matte” and click OK.

Screen Shot 2014-09-18 at 9.42.44 AM

2. Pick a warm orange or yellow kind of color as shown in the picture below. Title this color matte with any name you wish.

Screen Shot 2014-09-18 at 9.43.53 AM

3. This color matte with appear with your other video clips. Select it and drag it above the footage that you wish to make look vintage in V2 of your sequence. The footage will appear as the solid “yellowish” color as shown below.

Screen Shot 2014-09-18 at 9.45.03 AM

4. In order to blend this color with your footage, make sure your color matte is selected and go to effect controls. Find opacity in the video effects section. Go to blend mode and click the option called “Darken.” This option looks for colors that are lighter than the “yellowish” color and alters them accordingly.

Screen Shot 2014-09-18 at 9.45.41 AM

5. At this point, your video should have a vintage effect. You can change the opacity percentage to make the vintage weaker or stronger in order to achieve your desired look. You can make it look slightly vintage or heavily vintage In the picture below, I changed the opacity to 85% to achieve the vintage look I thought looked good for this shot.

Screen Shot 2014-09-18 at 9.47.46 AM

Now your video has an awesome and easy vintage effect! As I said before, you could also use this same technique with different colors to give your videos a different feel. I image you could use a blue color matte to achieve the same fee as Blue City, like we watched in class. What other things could you do using this technique?

Screen Shot 2014-09-18 at 10.22.37 AM