How to Make a Video of a Cat Having Fun at the Beach

Everyone who owns a cat knows how bothersome it is to bring them to the beach. What if you forget her tiny cat bathing suit at home, or her favorite treats? What if she gets sad when she looks at the big ocean and ponders the smallness of her life? And good luck trying to find flippy floppies that stay on her little toes.

Now, you and your cat can enjoy memories of beach adventures without all the hassle. All you need to do is use Adobe Premiere Pro to make a video of your cat having fun at the beach. Simply follow these 7 easy steps:

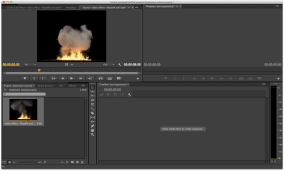
1. In a new project, import 2 videos: one of your cat with a green screen background, and one of a simple beach scene. Drag and drop these videos into the box in the bottom left corner that says “Import media to start.”

Screen Shot 2014-09-20 at 11.20.43 PM

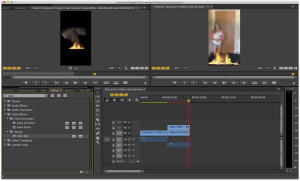
2. Drag and drop the beach video into the Video 1 (V1) slot. Drag and drop the cat video into the Video 2 (V2) slot. You want to make sure the cat video is in a slot with a higher number than that of the beach video so that the cat will show up on top of the beach layer.

Screen Shot 2014-09-20 at 11.26.22 PM

3. Remove the audio from both clips (unless you’re ok with them meshing). To do this, simply click once on each audio segment and hit the delete key on your keyboard.

Screen Shot 2014-09-20 at 11.28.25 PM

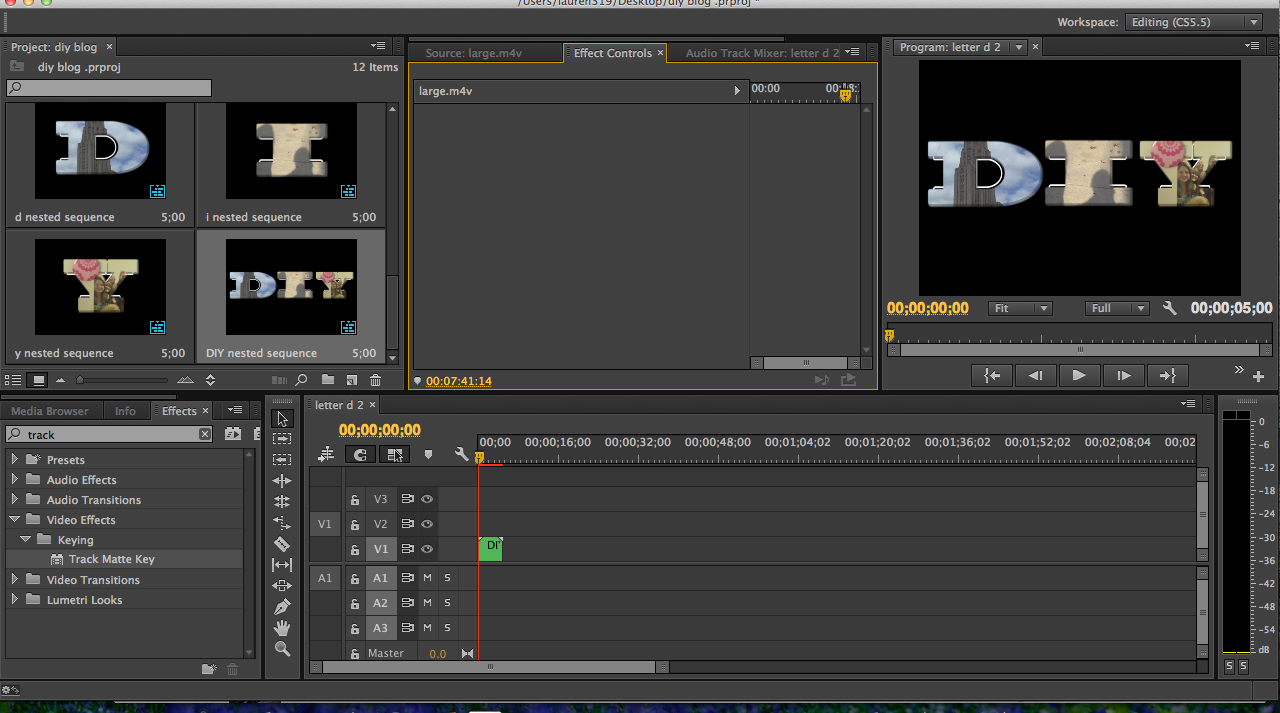
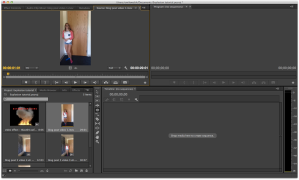
4. Apply the “Ultra Key” effect to your cat video. In the tabs on the bottom-left box, go to Effects > Video Effects > Keying > Ultra Key. Drag and drop the “Ultra Key” effect onto the cat video. You’ll see the gray “fx” box (next to the cat video title) on the blue video bar turn purple. This indicates that you successfully applied an effect to that clip.

Screen Shot 2014-09-20 at 11.35.38 PM

5. Now you need to modify the effect. Open the cat video’s “Effect Controls” tab. You can find this tab in the upper left box. Go to Video Effects > Ultra Key. Click the eye dropper on the “Key Color” line.

Screen Shot 2014-09-20 at 11.40.36 PM

6. Using the eye dropper as your cursor, click the green screen background. The green background will disappear, leaving only the cat.

Screen Shot 2014-09-20 at 11.43.29 PM

7. Enjoy your new video of your cat having fun at the beach!

Screen Shot 2014-09-20 at 11.50.24 PM

How To Create A Kickass Title Page

This DIY blog post will teach you how to make a title page that has moving video clips within the text. To begin, go to the Title drop down menu and select “New Title.” Select “Default Still.” Name your title. Type your letter with any font. I used “Blackoak White 75” because it was big and bold. Adjust the size of the text, then position the letter in the center of the screen. Close the screen to save changes.

1058

Next, select your new title. Select the Edit drop down menu. Select “Copy,” then select “Paste.” Double click on the new copied version. Change the fill type of the letter from “Solid” to “Ghost.” Then check the “Outer Strokes” check box. From there, check the “Shadow” check box. Change the distance of the shadow from 7 to 20. Close the screen to save changes.

Repeat this step for the rest of the letters in your title. My title was DIY, so I started off with D, then repeated the process for I, and again for Y.

Once this is completed, drag and drop the first version of your first letter into Track 3, and the second version into Track 1. Repeat this process with the rest of your letters.

1103

Now you must import a video clip. Go to the File drop down menu and select “Import.” Import your files. Take a cut of your clip and drag and drop it into Track 2 in between the two tracks of your first letters. Adjust the length of the clip so that it is equal to the length of the two letters. Repeat the process with the rest of your letters.

Next, go to Effects and, in the search bar, type in “Track Matte Key.” Drag and drop this effect onto the first video clip in track two. From there, click the Effect Controls panel, and change the Matte from “none” to “Video 3.” This will put your video clip inside your letter. Repeat the process with the rest of your letters.

1107

After this, it is time to nest sequences. To do so, select the first version of the first letter, the video clip, and the second version of the first letter. Go to the Clip drop down menu and select “Nest…”. This will turn all three of your clips into one. Repeat with other letters.

Drag all of your nested sequences into a column in Tracks 3, 2, and 1. This will overlay all of your letters.

1110

Select one of your letters, and go to the Effect Controls panel. Using the “Motion” drop down, adjust the size and position of the letter on the screen to your liking. Once you are satisfied, nest all three letters into one complete clip.

You’re done! Now you have a title page with individual moving clips inside the text!!

1115

Scale it, Crop it, Spin it, quick, reframe it.

Please listen to this song as you read my tutorial.

So, I’ll be teaching you how to scale, crop, and rotate images on screen. I ran into the problem of filming vertically without realizing how it’d turn on in Adobe. I know it’s not a cool tutorial, but it’s practical and you might need it at some point!

1. Select clip that needs to rotated and cropped. The screen might look this at first.

Screen Shot 2014-09-18 at 5.15.22 PM

2. Double click on the clip in the preview and the scaling measures will appear. If the frame is too big, like mine, drag the frame until you see the edge of the video frame. The clip will be outlined in white and have six squares for scaling.

Screen Shot 2014-09-18 at 5.15.36 PM

3. Next scale clip to desired size.

Screen Shot 2014-09-18 at 5.15.48 PM

4. Select the effect controls tab, next to the clip previewer. Under the Motion selections, double click on Rotation. Then input desired rotation.

Screen Shot 2014-09-18 at 5.17.04 PM

5. The clip has now been rotated and should look this. Now to crop the clip.

Screen Shot 2014-09-18 at 5.16.22 PM

6. Under Video Effects in the lower left hand corner, drop down the options and under Transform, select Crop. Then drag the Crop effect over the clip you wish to crop.

Screen Shot 2014-09-18 at 5.18.47 PMScreen Shot 2014-09-18 at 5.18.57 PM

7. Under the Effect Control tab, Crop will appear at the bottom of the menu. Drop down the options (sorry! forgot to screenshot this!) and input the dimensions to be cropped.

Screen Shot 2014-09-18 at 5.19.13 PM

Finished product should look like this!

Screen Shot 2014-09-18 at 5.20.24 PM

I hope you guys found this helpful!

How To Make Your Roommate Appear Out of An Explosion: Very Useful

Have you ever wondered what it would be like to have your roommate enter into your living room WITHOUT using the door? Well I, myself was extremely curious. Of course, I had to make it as dramatic as possible so my roommate, Hope, who I so kindly volunteered to be in this video tutorial, had to enter with an “explosion,” like many magicians have done in the past.

Screen Shot 2014-09-18 at 3.57.41 PM

To begin, I simply imported a lovely clip of a small-scale explosion into Adobe Premiere Pro. I then uploaded a video clip of just my door and then one of my roommate, Hope, jumping in front of the door.

Screen Shot 2014-09-18 at 3.58.22 PM

After cutting unnecessary parts of the videos out, I then moved the video clips of the explosion and of my roommate jumping so that they were overlapping. One would then go into effects, and underneath Video Effects find “Keying” and then “Luma Key.” Simply drag that effect on top of the clip of the explosion and the dark background surrounding the explosion will go away so that the overlapping video (the one of my roommate) will be shown with the fire. Then take out or put in audio effects as desired; I decided to go with Ellie Goulding’s song “Explosion” for I felt it went perfectly with the video.

After these simple steps you will have a shocking, pull you towards the edge of your seat, exploding entrance! Here’s the link to the full video! https://vimeo.com/106548748 if that does not work, it is titled “Blog Post-Explosion Tutorial”

Screen Shot 2014-09-18 at 8.09.25 PM

The Magic of Audition (and some other tricks).

When I first started editing my video, I noticed that most of my audio had a hissing or humming noise in the background. I googled ways to fix this problem, and every tutorial I watched told me to simply drag the DeNoiser effect onto my audio and mess with the Reduction in the Individual Parameters section. This didn’t work for me. I tried using the DeCrackler, the DeHummer, and the DeEsser (although I have no idea what that even means), but none of them worked. I decided to leave my audio scratchy and tried  drowning out the hissing with music, but then I remembered that there is an audio editing program that comes with The Creative Cloud.

This magical audio editing program is called “Audition” and it pretty much saved my project (not really, but kind of). If you right click on a piece of audio, there is an option that says, “Edit Clip in Adobe Audition.” When you click that option, Audition opens and shows your audio in a new window.

Screen Shot 2014-09-18 at 7.39.10 PM      Screen Shot 2014-09-18 at 7.40.20 PM

In order to edit your audio and eliminate any background noise, you will want to have a colored view of your audio so you can see where the major problems are located. To do this, all you have to do is press the “Show Spectral Frequency Display” button located along the top of the Audition window. Once you press this button, you should see your audio in red, orange, and purple.

Screen Shot 2014-09-18 at 7.45.33 PM

Next, press the “Time Selection Tool” button at the top of the window and drag your mouse across your audio, highlighting the entire piece of sound in white.

Screen Shot 2014-09-18 at 7.46.57 PM

Then, click on “Effects,” select “Noise Reduction/Restoration,” and click “Hiss Reduction.” Another window will pop up and all you have to do is click “Apply.” This should take away some of the background noise you have. If you still have background noise, try following the same process again, but choose “DeHummer” instead. The “DeHummer” took away some low air-conditioning noise when I was editing.

Screen Shot 2014-09-18 at 7.48.23 PM     Screen Shot 2014-09-18 at 7.50.33 PM

After this, simply click “save” in Audition, return to Premiere Pro, and your old audio should be swapped out with your newly edited sound.

I also decided that I wanted to give my audio an older sound since the entire theme of my video is Nostalgic. By doing a little bit of research, I learned a way to make your audio sound like it is playing through an old radio. All you have to do is put the Bandpass and Highpass effects on your audio, and adjust the Hz of each. For my video, I set the Bandpass effect to 1450 Hz and the Highpass to 775 Hz. In my opinion, this gives the audio a distant sound, which can be cool if you are trying to make an old-time video.

Screen Shot 2014-09-18 at 7.58.33 PM

While completing this project, I’ve found that a very large portion of my work includes fixing my own mistakes and applying effects and transitions just to see what they will do. I usually end up deleting them later. There is a lot of trial and error with this project; it can be frustrating, but it is very rewarding when your video finally starts to come together.

Be Ken Burns in Adobe Premiere

For one shot of my documentary, I wanted to take a photograph and pan up it for some nice B-roll footage. I was completely unsure of how to do this until I messed around with some of the parameters in the Effect Controls panel.

Load your picture into the Project Panel (on the left) and drop it where you want to use it in your video, A- or B-roll. Double click it so it fills up your Effect Controls panel (in the middle). Bring down the Motion drop-down and select the animation for “Position”. Double click the picture in the playback window (on the right) and text box-like sliders will appear. Drag the picture down to the bottom, so it’s in the same position as mine.

Screen Shot 2014-09-18 at 6.05.46 PM

Once it’s in place, put a keyframe at the start of your mini-timeline in the Effect Control panel to tell that this is where you want your shot to start.

Drag upwards on your picture until you reach the top, as shown here.

Screen Shot 2014-09-18 at 6.06.16 PM

Add another keyframe at the end of your mini-timeline to show that this is where you want your shot to stop.

Your Effect Control panel should now look something like this:

Screen Shot 2014-09-18 at 6.05.14 PM

Press space and see your pan in acton!

Star Trekerize Your Cat Using Lens Flare and Color Balance

Ba-F7t1IQAATP48

This is Keekee, she’s a cat.  Keekee loves Star Trek, especially the new J.J. Abrams ones and she wanted to be in the new film, unfortunately she didn’t make the part, so lets make our own film.

Star Trek: Keekee vs. The Giant Purple Elephant

1. Okay so here we have Premiere Pro and our footage of Keekee and the elephant loaded in. Search for the lens flare effect in the bottom left and drag it onto your clip.

Screen Shot 2014-09-18 at 2.55.14 PM

2.So now you should see a static lens flare as seen below on your video.Screen Shot 2014-09-18 at 3.09.04 PM

3. This is no good however, because if you ever watched the new Star Trek films, J.J. Abrams’ lens flares move… a lot.  So we’re going to go over to the effect settings, click on lens flare, and click on the stopwatch next to flare center.

Screen Shot 2014-09-18 at 3.04.38 PM

4. This will allow you to animate the lens flare simply by clicking and dragging the flare on your video. As you see in the following pictures i moved the lens flare with Keekee’s movement across the screen by scrubbing to different parts of the video.

Screen Shot 2014-09-18 at 3.11.12 PM Screen Shot 2014-09-18 at 3.11.21 PM Screen Shot 2014-09-18 at 3.11.28 PM

5. Okay Keekee’s almost a Star Trek star! However her big scene can use a little bit more bluish purplish hue, so we’ll search for the color balance effect, drag it on our clip, and adjust the settings to add a little blue and some red.

Screen Shot 2014-09-18 at 3.12.38 PM

Screen Shot 2014-09-18 at 3.28.27 PM

6.)Awesome! Keekee’s so happy she’s in Star Trek! You can watch the final video below. Live long and prosper! -John

Reverse! Reverse!

Don’t start cha-cha’ing real smooth just yet though. First you got to take a look at this tutorial for making a rewind effect in Adobe Premiere Pro. Now I’ll be using the newest version 6.0 for my tutorial, but the gist should still be if you’re using 5.5 or 5.0.

So first you’ll want your desired video up and ready to be tinkered with. But! If you want to rewind the video that just played, or have the first video rewind and then have it play through from the beginning right after, you’ll need to have two copies of the desired video like so:

first

Next you’ll want to right click on the one you want to reverse. I’ll be reversing the second copy of the video. And then you’ll select Speed/Duration in the drop down menu shown.

speed

In the pop up window that then appears, you’ll want to click the check box next to Reverse Speed. This will then reverse the video selected. Also on this pop up box, you can choose to speed up or slow down the video upon which you can also check off to maintain Audio Pitch as well.

pop up

After clicking OK, watch your video and you are now a master of time… at least within Adobe Premiere Pro.

How to: Trendy Vintage Video on Premiere Pro

This “How to” blog will show you one way that you can take certain parts of your video or your entire video and make them have an antique or vintage look. This technique could also be applicable to shading your video with different colors as well to acquire different effects. To begin open up your project and go to the area that you wish to make look vintage.

1. First, go to File at the top of your computer screen, and go to “New.” Select “Color matte” and click OK.

Screen Shot 2014-09-18 at 9.42.44 AM

2. Pick a warm orange or yellow kind of color as shown in the picture below. Title this color matte with any name you wish.

Screen Shot 2014-09-18 at 9.43.53 AM

3. This color matte with appear with your other video clips. Select it and drag it above the footage that you wish to make look vintage in V2 of your sequence. The footage will appear as the solid “yellowish” color as shown below.

Screen Shot 2014-09-18 at 9.45.03 AM

4. In order to blend this color with your footage, make sure your color matte is selected and go to effect controls. Find opacity in the video effects section. Go to blend mode and click the option called “Darken.” This option looks for colors that are lighter than the “yellowish” color and alters them accordingly.

Screen Shot 2014-09-18 at 9.45.41 AM

5. At this point, your video should have a vintage effect. You can change the opacity percentage to make the vintage weaker or stronger in order to achieve your desired look. You can make it look slightly vintage or heavily vintage In the picture below, I changed the opacity to 85% to achieve the vintage look I thought looked good for this shot.

Screen Shot 2014-09-18 at 9.47.46 AM

Now your video has an awesome and easy vintage effect! As I said before, you could also use this same technique with different colors to give your videos a different feel. I image you could use a blue color matte to achieve the same fee as Blue City, like we watched in class. What other things could you do using this technique?

Screen Shot 2014-09-18 at 10.22.37 AM